Dead Nintendo Switch?

“I'm sure this is irrelevant chatter but a few days ago I turned on my Nintendo Switch for the first time in months but the battery had drained, so I went to charge it but noticed after 20 minutes it still wouldn't turn on, I tried using another plug and putting it in the dock, it still wasn't working, I knew from early YouTube videos that some people had this problem and sold their console on eBay as "faulty, not accepting charge" when the console was first on the market, not wishing to sell my console I proceeded to calmly take it appart in an attempt to disconnect the battery and plug it in again in order to wake it up, however I'd forgotten how to remove the battery and wasn't sure the tools I had were best for the job, looking at the connector though made me realise if use 2 electrical screwdrivers, I could short the pins, simulating a temporary disconnect, I allowed the battery to spark for a split second and reassembled the unit. Hey presto, the Nintendo Switch is back in full working order, end of story. Good day to you all.”

James Barnes

HowTo: Linux, Nginx, Mono, Asp.Net Mvc

These are notes I made for getting an application written for Asp.Net Mvc (It was probably Mvc 3-ish) to run on a Centos server.

Note that some of the issues/solutions may vary across Linux variants. The interface Nginx-Mono is FastCGI, which they both support. The Mono webserver is xsp4.

Of course, running cross platform is all much easier these days if you use .Net Core and Kestrel 🙂 And een for Net Framework running on Mono, the work done since Microsoft bought Xamarin has been really helpful for e.g. Mvc compatibility.

The Reading List

The Checklist

Ensure nginx has read execute permissions on your application directory and all parent directories

nginx conf section for webapp

With the Asp.Net website listening on port 9001

#
server {
listen 8080;
server_name your-public-facing-nginx-server-name.com;

# use /smoketest/ to confirm that nginx is reading this config 
# and has read/execute access to the 
# /usr/share/nginx directories and files:

location /smoketest/ {
root /usr/share/nginx/smoketestredir;
index index.html;
}

# pass XSP to FastCGI server listening on 127.0.0.1:9001
# use a different port for each ASP.NET site you create
# (port 9000 is often taken by PHP on default webserver setups)

location / {

# replace fastcgi with this to confirm nginx read address
# to files in root /usr/share/nginx/mywebapplication;
fastcgi_pass  127.0.0.1:9001;
fastcgi_index index.html;

include /etc/nginx/fastcgi_params;
fastcgi_param  PATH_INFO          "";
fastcgi_param  SCRIPT_FILENAME    $document_root$fastcgi_script_name;

fastcgi_buffers 16 16k;
fastcgi_buffer_size 32k;
}
}

Systemd Startup Script

vim /etc/systemd/system/fastcgi-mono-hdmbreas.service

[Unit]
Description=FastCgi-mono-server4 for Application
After=syslog.target

[Service]
Type=simple
ExecStart=/bin/fastcgi-mono-server4 --applications /:/usr/share/nginx/hdmbreas/hdm-fe-web --socket=tcp:127.0.0.1:9001
Restart=always

systemctl daemon-reload
systemctl start fastcgi-mono-app.service
systemctl status fastcgi-mono-app.service

Error: [error] 7216#0: *119 upstream sent too big header while reading response header

  • Considering setting the buffer size
  • Considering setting the busy buffer size
  • e.g. nginx config: fastcgi_buffers 16 16k; fastcgi_buffer_size 32k;

Watching Errors

Watch errors with tail -F /var/log/nginx/error.log

Adding your Outlook.com account to MacOs as an Exchange account.

Is simple when you know how. Possibly harder if, like me, your outlook login is not an outlook.com email address, but your own domain.

System Preferences -> Add Internet Account -> Choose the Big Exchange Button

MacOs System Preferences with “Internet Accounts” Highlighted

First, get an app-password from your outlook.com account
Then note the Exchange server URL: https://outlook.office365.com/EWS/Exchange.asmx
Then, try to add your account just by typing in your email address and the app-password you got.
If that doesn't work, and you get the “Unable to verify account name or password” paste the Exchange server URL into the two boxes for Internal URL and External URL:

MacOs Mojave Add an Outlook.com account

And that works for me™ on MacOs Mojave in 2019.

MacBook Pro 2011 17″ Disable Broken Radeon Graphics Card and Force use Integrated Graphics

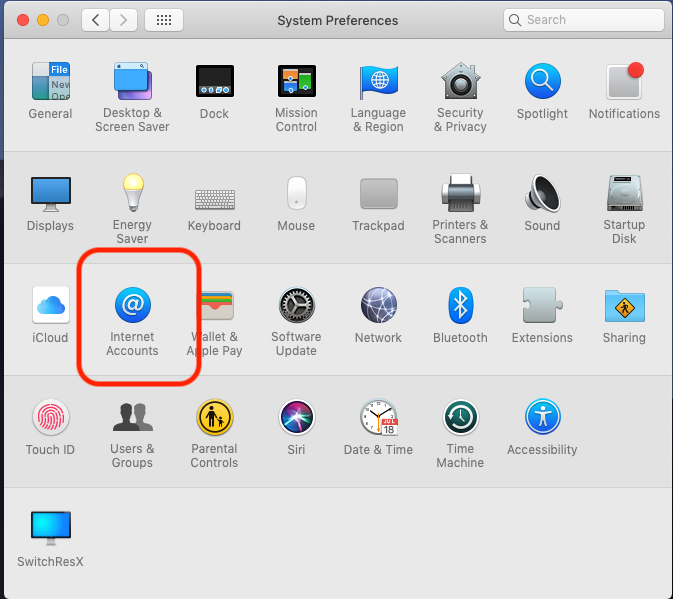
If you own one of the last generation of 17" MacBook Pros from 2011, and if you have worked with a large external monitor, you may reach the point of frying the Radeon graphics card.

Since the model also has built-in Intel graphics, the question arises, can I not carry on working with that?

Yes you can.

This script helps you to disable the card at boot, and force use of the Intel integrated graphics. And, to re-run that process after an O/S update has undone the changes. The loss is that you can no longer plug an external monitor in. The gain is that your MacBook 17" now works again, and runs slightly cooler/at lower power to boot.

Several steps are involved. I wrote a script to reduce the steps to:

1. Boot to recovery mode and run the script
2. Boot to single user mode and run the script
3. Optionally boot to recover mode again to re-able SIP.

Recall that to run the script you must make it executable: chmod a+x force-integrated-graphics.sh

But how do I use this if I've already broken the graphics card?

* You should still be able to use the Cmd-S, or Cmd-RS keypresses at boot to get to a command line. If you can get from there to a pendrive or a network drive, then you can copy the script.

https://gist.github.com/chrisfcarroll/ff8ad18be53b0391464a9affeb119364

#! /bin/sh

kextoffdir="/kextoff"
loginhookscript="/Library/LoginHook/LoadDelayedAMDRadeonX3000kext.sh"

echo "---------------------------------------------------------------
Run this script twice.
First, from a Recovery Mode commandline to run csrutil disable.
Second, after rebooting to a Single user mode commandline, with / partition mounted writeable, to do all the things that must be done with csrutil status= disabled

After that, rerun Recovery mode to run \`csrutil enable\` again.

* How to start in Recovery mode? Cmd-R

* How to start in Single user mode? Cmd-S

---------------------------------------------------------------
"

echo "
nb: csrutil disable only works in recovery mode
"
csrutil disable
echo "
csrstatus:
"
csrutil status

echo "
Moving the AMDRadeonX3000.kext out of extensions and updating the extensions cache
"
mount -uw /
mkdir -p $kextoffdir
mv /System/Library/Extensions/AMDRadeonX3000.kext/ $kextoffdir/
touch /System/Library/Extensions/

echo "
Set nvram magic things. This is the step that disables the Radeon as the bootup graphics card
"
nvram 'fa4ce28d-b62f-4c99-9cc3-6815686e30f9:gpu-power-prefs=%01%00%00%00'
nvram boot-args="-v"
nvram fa4ce28d-b62f-4c99-9cc3-6815686e30f9:gpu-power-prefs
nvram -p

echo "
Add a loginHook to load AMDRadeonX3000.kext after boot
"
mkdir -p /Library/LoginHook

cat > /Library/LoginHook/LoadDelayedAMDRadeonX3000kext.sh <

Kudos and References

* https://apple.stackexchange.com/questions/166876/macbook-pro-how-to-disable-discrete-gpu-permanently-from-efi
* https://github.com/codykrieger/gfxCardStatus